


How To Replace a Bathroom Faucet: A Step-By-Step Guide
Old, leaky bathroom sink faucets look outdated, function improperly, and can damage your property and increase your water bills. In fact, a single leaky faucet can waste approximately 3,000 gallons of water per year, according to the U.S. EPA. So if your faucet is showing its age, there’s a strong financial incentive—and aesthetic benefit—to upgrade.
Replacing bathroom faucets is usually an easy DIY project. To succeed, you need to prepare, gather the right tools and follow the appropriate steps. This guide will walk you through replacing your faucet to make your project a snap.
Before You Begin: Important First Steps
Replacing your faucet involves more than just pulling out the old one and screwing in a new one. Consider a few pre-installation must-dos.
Choose the Right Faucet
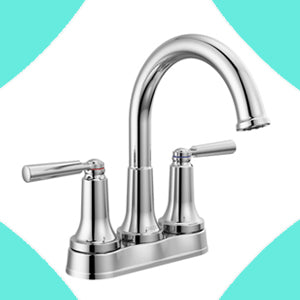
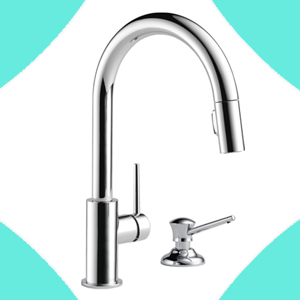
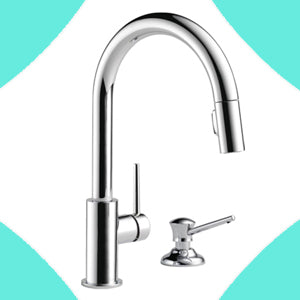
Not all bathroom sinks and faucets are the same. You’ll want to replace your existing faucet with one that fits your sink design. The three main types of faucets are:
-
Single-hole faucets: Designed for sinks with one drilled mounting hole. The knob and faucet are often part of the same unit.
-
Centerset (4-inch) faucets: Centerset faucets typically have the hot water handle, cold water handle and spout mounted on a single base. They require three mounting holes spaced four inches apart.
-
Widespread (8-inch): These faucets are for sinks with three holes spaced eight inches apart. Unlike centerset faucets, the spout and handles are separate.
To choose the right faucet for your bathroom, measure the distance between your sink’s holes. That way, you can get the one that fits.

Gather Appropriate Tools
Having the right tools before installing your faucet will help you avoid slowdowns and frustrations. They can also ensure you don’t damage the faucet during installation. You’ll likely need:
-
An adjustable wrench
-
A basin wrench or a similar tool for working in tight spaces
-
Pliers
-
A bucket or small basin
-
Plumber’s putty or silicone caulking
-
A sponge, absorbent cloth or towels (for both cleaning and spills)
Shut Off the Water
This is the most important pre-installation step. If you don’t shut off your water, an open pipe with pressurized water will shoot into your bathroom. It goes without saying that this will create quite a mess.
You can usually shut off the water locally using the hot/cold supply valves located under most sinks. This will stop the flow of water to the sink, but keep the water on elsewhere. If your sink doesn’t have a shut-off valve, you may have to shut off the entire water supply from the water main. After shutting off the water, turn the faucet back on to release remaining water and pressure in the lines.
Replacing Your Bathroom Sink Faucet
After the prep work, it’s time for the actual faucet installation. This involves removing the old faucet, placing and securing the new one, and testing for problems or leaks. Each task takes a few steps.
Step 1: Remove the Old Bathroom Faucet
Before removing the old faucet, place a bucket or basin under the sink to catch any residual water. Place towels around the basin for added protection.
-
Disconnect the supply lines: Using your adjustable wrench, unscrew the hot and cold water supply lines from the sink. It’s okay if a little water spills. That’s what the basin is for.
-
Disconnect the drain lift rod: Unhook the rod behind the spout that controls your faucet’s drain stopper.
-
Unscrew the mounting nuts: Most faucets are secured to the sink using mounting nuts; unscrew these and set them aside.
-
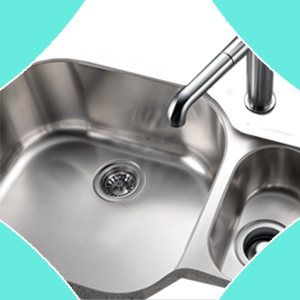
Remove the old faucet: Carefully pull the old faucet and handles away from the sink. If the faucet was sealed with plumber’s putty, this may require a little pressure. The hole(s) should now be easily visible.
-
Clean the area: Wipe and dry the area around the hole(s). You may notice some grime, mold or other buildup. Clear away any residual putty or sealant using a scraper (preferably a plastic one that won’t damage surfaces).

Step 2: Install the New Bathroom Faucet
Once you have a clean surface, you can begin installing your new faucet. A pristine working space ensures your new fixture mounts properly.
-
Prepare the faucet and seal: Remove your faucet from the packaging. Some faucets will include a gasket that goes between the faucet base and the countertop to create the new seal. Others will require a thin layer of plumbing putty as a sealant. Consult your manufacturer’s instructions for the exact guidelines.
-
Place the new faucet: From the top, carefully set the new faucet and tap knobs into the appropriate holes and align them. Proper alignment ensures the faucet seals (reducing the risk of water intrusion).
-
Secure the faucet underneath: Using the provided mounting nuts, secure the faucet/knobs. You can hand-tighten the nuts or use a wrench. Create a snug, even fit.
-
Reconnect the water lines: Attach the new hot and cold water lines to the faucet. In most homes, hot water attaches to the left line, and cold is on the right. Create a snug fit to prevent leakage.
-
Reconnect the lift rod: If your new drain has a lift rod, reattach it following your manufacturer’s guidelines. If your new faucet fixture includes a new drain stopper, you can install it at this point.
Step 3: Test for Leaks
Once everything on your bathroom sink and faucet is reattached, it’s time for a little quality assurance—better known as testing for leaks.
-
Turn the water back on: Slowly open the hot and cold water supply valves. Keep your towels and drainage basins handy. Tighten the pipes as necessary.
-
Test the faucet: Let the water run for a minute or two. If you have separate hot and cold water taps, ensure the right temperature is coming out of the right pipe. A little discoloration is okay as the water restarts.
-
Inspect all connections: While the water is running, inspect the area around the faucet (both on top and underneath). If you notice any water intrusion, you may need to tighten the nuts and bolts.
The great thing about installing a new bathroom sink faucet is that it’s generally something you can do yourself. Most faucets include detailed, specific installation instructions. However, if you’re uncertain, a plumber or installation professional can usually install the piece with ease.

Shop Premium Replacement Faucets for Less
Installing your bathroom sink faucet is usually easy, and ordering one should be, too. With a wide selection of quality, recertified, mint-condition faucets at your service, Mintera makes it easy to get the perfect item for your space while saving you up to 80% off regular retail prices.
Explore our bathroom faucet options today and get ready to spruce up your space.


