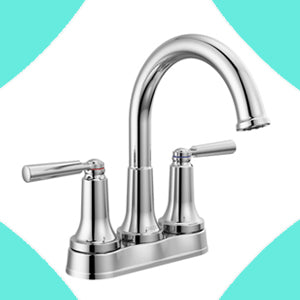


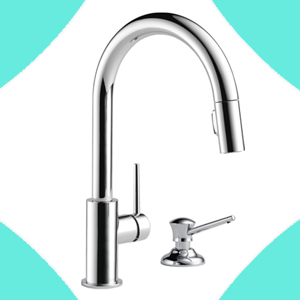
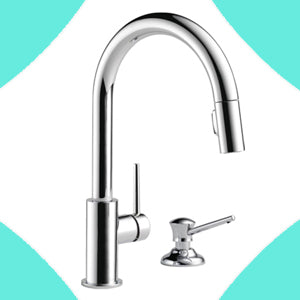


How to Install a Delta® Single-Handle Bathroom Sink Faucet
You don’t need to completely renovate your bathroom to change things up. Sometimes, giving your space a new look is as simple as installing a new sink faucet.
In the steps below, we’ll show you how to confidently install a Delta® Single-Handle Sink Faucet. With a few tools and a little bit of time, learning how to install a Delta bathroom faucet is a DIY project that is well worth the effort. It’s the sort of home upgrade you can usually handle in no time, but when you’re finished, you’ll immediately see a difference in your bathroom.
Can you install a bathroom faucet yourself?
Generally, yes, bathroom sink faucets are quite easy to install yourself! The process is fairly standardized across most sink designs, plumbing setups and faucet models. Most faucets (Delta models included) also come with comprehensive installation instructions to follow.
Of course, if you have specialty designs (i.e. wall-mounted sinks) or unique plumbing, you might want to consider a professional plumber for the job. However, your average bathroom faucet installation is usually a project you can knock out in a couple of hours (at the very most).
Before You Begin: Essential Prep
Even though installing your new Delta sink faucet is fairly straightforward, it’s still not something to do without forethought. Before installing the faucet, remember a few critical preparations.
-
Turn off the water supply to the bathroom sink.
-
Identify the model of your Delta faucet. Delta offers a variety of single-handle sink faucets, and you’ll need to know specifically what you’re working with, just in case of small variances.
-
Gather the appropriate tools for your project.

Of all of these preparations, shutting off your water supply is the most important. If you leave the water on, you’ll have pressurized water shooting into your bathroom as soon as you try to disconnect the faucet. It goes without saying that no one wants that.
You can usually shut off the water using the hot/cold water shutoff valves, which are located under most sinks. If your sink doesn’t have a shut-off valve, you may have to shut off the supply from your home’s water main.
How Do I Know What Model Delta Bathroom Faucet I Have?
To identify your Delta faucet, use the model number. You’ll usually find the model number:
-
On a label attached to the faucet’s supply lines. Do not remove these labels, as they contain important information you might need later.
-
On a label on the product packaging (typically near the UPC code).
-
On the installation instructions.
If you cannot locate the model number via any of these methods, Delta’s online Product Identifier Tool may also help.
Tools and Supplies for Installing a Bathroom Sink Faucet
As a general rule of thumb, you’ll likely need at least the following tools to install your Delta faucet:
-
An adjustable wrench
-
Safety glasses
-
Towel(s)
-
Pot/bucket/basin to collect any dripping water.
-
A flashlight
-
Plumbers’ putty or silicone caulking
Keep in mind, however, that Delta typically includes a list of tools needed to install your faucet in the installation instructions. Some packages also include specific tools to use during installation. Consult your guide for more detailed information.
Step-by-Step Delta Single-Handle Bathroom Faucet Installation Guide
Once you’ve shut off the water and gathered the appropriate supplies, you’re ready to begin your faucet installation. It usually involves a few steps (and sub-steps).
Step 1: Remove Your Old Faucet
If you are replacing an existing faucet, you’ll naturally need to remove that one before placing your new faucet. The process for removing your existing bathroom sink faucet can vary a bit depending on your sink design, but is usually fairly straightforward.
Step 2: Determine Where To Place Your New Faucet
Once the old faucet is removed, you can begin placing the new faucet. Most single-handle Delta faucets are designed to fit either one-hole sinks or 4-inch three-hole (i.e., centerset) sinks. Your installation process may vary slightly depending on your current sink’s hole design.
-
If you have a one-hole configuration, you’ll place your faucet over that hole. Most Delta sinks include a plastic or silicone gasket that you will place between the sink and the faucet to create a tight seal. Most gaskets contain a ridged side and a smooth side. You will want the ridged side to face upward (so it touches the faucet) and the smooth side to face downward (so it touches the countertop).
-
If you have a three-hole configuration, you will place the faucet over the center hole. Your faucet package will usually include an escutcheon plate to cover the holes you won’t be using. You can keep the faucet and the escutcheon plate aligned by feeding the mounting stud on the faucet through the corresponding hole on the plate.
Step 3: Connect the Water Supply Lines
You’re now ready to connect the water supply lines to the faucet itself. It’s generally better to connect the lines to the faucet before threading them through the sink hole. You won’t have to crawl under the sink to attach the lines, and they can help stabilize and guide the faucet as you position it over the sink.
Most Delta faucets contain color-coded red and blue water hoses that correspond to hot and cold water, respectively. Gray supply lines also indicate a DST (Diamond Seal Technology) faucet. If your faucet does not contain supply lines, you will need to provide your own.
To attach the water hoses to the faucet:
-
Attach the blue line to the faucet’s corresponding cold water stub-out by tightening the nut. The nut should be snug, but not so tight that you can’t unscrew it later. You may see a diamond pattern on top of the nut. You can use that as your guide to know when you’ve tightened the nut appropriately.
-
Do the same for the red line and the hot water stub.
-
Feed both lines through the faucet’s escutcheon plate or gasket seal.
-
Feed the lines through the sink’s hole (remember, on a three-hole faucet, you will need to thread the lines through the center hole).
You should then bring the faucet itself—along with the corresponding escutcheon plate or gasket seal—into line with the corresponding hole(s). Do not attach the water lines to your water supply.
Step 4: Secure Your Faucet to Your Sink
With the faucet and water lines in place, you’re ready to secure the faucet to the counter. This is the point where you get to crawl under the sink (if you haven’t already).
Your Delta single-handle faucet will usually include a mounting bracket and a pre-loaded stud wrench. You’ll use these to attach the faucet to the sink.
-
Hold the bracket so that the bumps are facing upward. The curved side of the bracket should face the wall behind the sink.
-
Feed the bracket into the faucet’s mounting stud via the appropriate hole in the bracket. Slide the bracket up the mounting stud until it makes contact with the bottom of the sink.
-
Use the pre-loaded wrench and screw the nut into the mounting stud until it is secure. If you’re working alone, you may have to do a little tightening and re-tightening as you work to ensure proper faucet alignment with the sink.
If your faucet does not use a bracket, follow the steps listed in your installation guide.
Step 5: Check the Seals
With the faucet secured to the sink, it’s time to check the seal around the faucet base. Again, you may have to un-tighten and re-tighten the bracket to ensure proper alignment and sealing.
Generally, the gasket or escutcheon plate will make even contact with the sink all around, creating the seal that keeps water out. However, if you have a tiled countertop or uneven surface, you may need to apply some plumbing putty or silicone caulking to fill the gaps. Making your seal as strong as possible helps ensure there’s no water intrusion under the faucet or under your sink.

Step 6: Reconnect to Your Main Water Supply Lines
After this, you’re ready to reconnect your faucet’s water lines to the main water supply.
-
Connect the cold hose to the cold water and the hot hose to the hot water using the red/blue color codes.
-
Tighten the hose so that it’s snug, but not too tight. Then, turn on the water in the line. Check for any immediate signs of leaks.
Step 6: Test and Flush the Faucet
From there, you’ll want to test the faucet and flush the line to remove any debris. If your Delta faucet’s packaging included an aerator wrench, this is where you’ll use it.
-
Unscrew the aerator cartridge attached to your faucet’s spout. Using the wrench, unscrew the aerator and set it aside temporarily.
-
Turn the faucet on to the “full mix” position (straight up in most cases)—the setting where both hot and cold water are open at maximum flow. You may want to cover the faucet to prevent too much splashing.
-
Run the water for about 30 seconds to one minute to clear away any debris. Replace the aerator cartridge on the spout and tighten it. Check for leaks.
And with that, congratulations! You’ve just installed your Delta single-handle bathroom faucet! You’re now ready to enjoy your new fixtures.
Find Your Next Faucet with Mintera

Ready to upgrade your bathroom sink fixtures, but don’t know where to start? Mintera’s got it handled. Our wide selection of quality recertified Delta products has something for everyone, and with deals of up to 80% off the original retail price, it’s never been easier to get a mint-condition replacement product without paying an arm and a leg. Shop and save today, enjoy forever.


